Documentation Index
Fetch the complete documentation index at: https://domoinc-jkreitzman-patch-1.mintlify.app/llms.txt
Use this file to discover all available pages before exploring further.
Intro
Power BI is a business analytics service by Microsoft. It aims to provide interactive visualizations and business intelligence capabilities with an interface simple enough for end users to create their own reports and dashboards. With Domo’s Power BI AAD Writeback connector, you can transfer your data from a Domo dataset to your Power BI dataset. To learn more about the Power BI API, visit their page (https://docs.microsoft.com/en-us/rest/api/power-bi/)). You configure your Power BI AAD account in the Data Center. This topic discusses the fields and menus that are specific to the Power BI AAD Writeback connector user interface. General information for adding DataSets, setting update schedules, and editing DataSet information is discussed in Adding a DataSet Using a Connector.Note: The owner of a writeback dataset must also be an owner or co-owner of the input dataset.
Prerequisites
To configure this connector, you must have the following:- An installed Microsoft Azure app.
- The Client ID and Client Secret for your Azure app.
- The Tenant ID for your Azure app. This is generated when you create your Azure app.
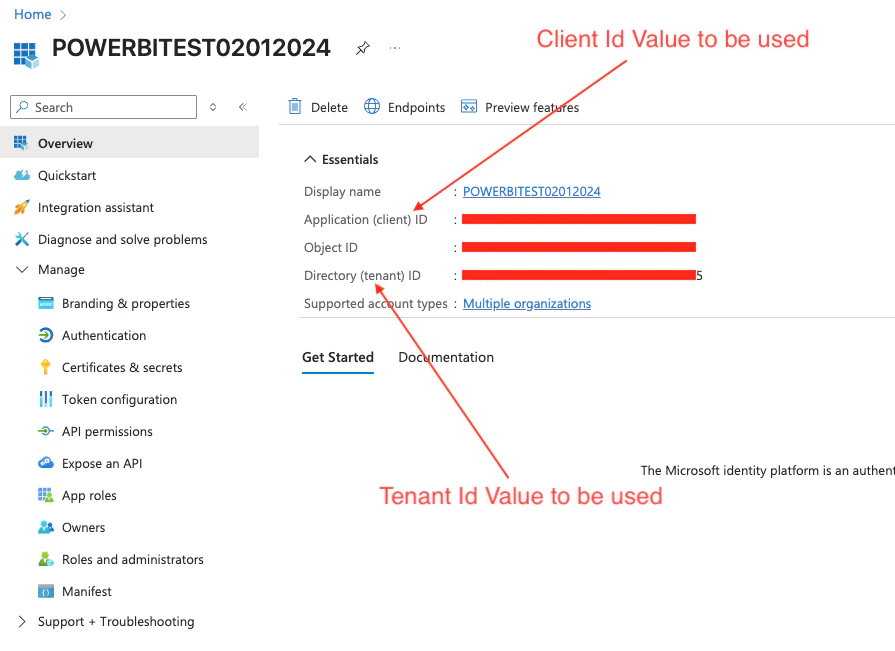
To obtain the Azure App Client ID:
- Go to https://portal.azure.com.
- Select Microsoft Entra ID > Under Manage > Select App registrations.
- Find and click on your web app.
- The “application ID” is your Client ID.
To obtain a new Azure App Client secret:
- Go to https://portal.azure.com.
- Select Microsoft Entra ID > Under Manage > Select App registrations.
- Find and click on your web app.
- Under Manage > Certificates & secrets.
- Click +New client secret.
- Provide the client secret description and the expiry period for your secret. Click Add.
- Your new client secret will appear. Copy it and paste in your Domo connector Client Secret field.

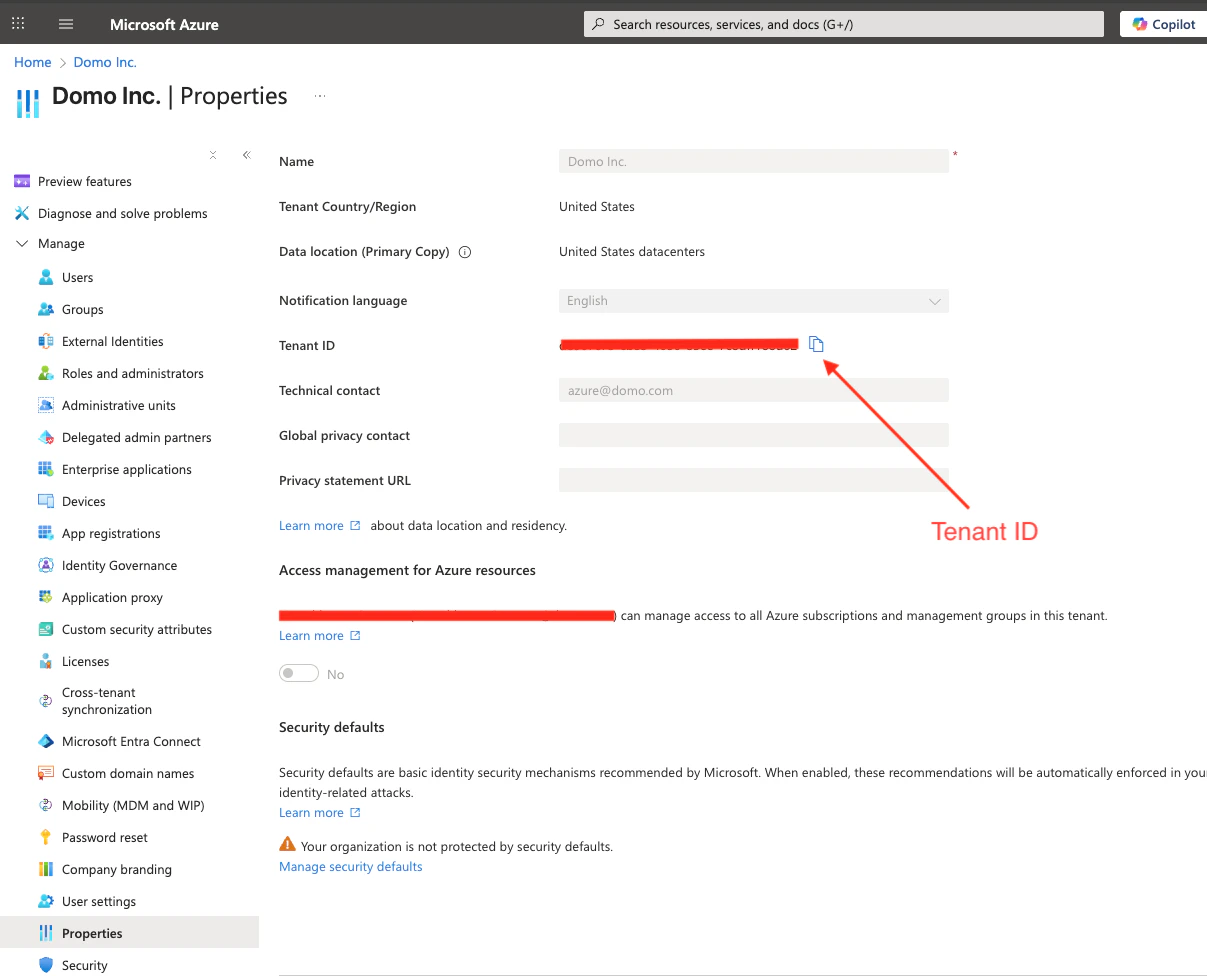
To obtain the Tenant ID:
- Login to the Azure Portal (https://portal.azure.com).
- Navigate to Microsoft Entra ID >> Under Manage >> Properties.
- Copy the Tenant ID.
Creating an Azure App for Enterprise OAuth
To create a Microsoft Azure app, do the following:- Log into https://portal.azure.com.
- Click on App registrations.
- Click New registration.
- Enter the application name and select the supported account type as below. Enter the Redirect URI for Web as https://oauth.domo.com/api/data/v1/oauth/providers/power-bi-writeback-aad/exchange
- Click Register. Once the application is registered, you can view the Client ID (application ID), client secret, and tenant ID.
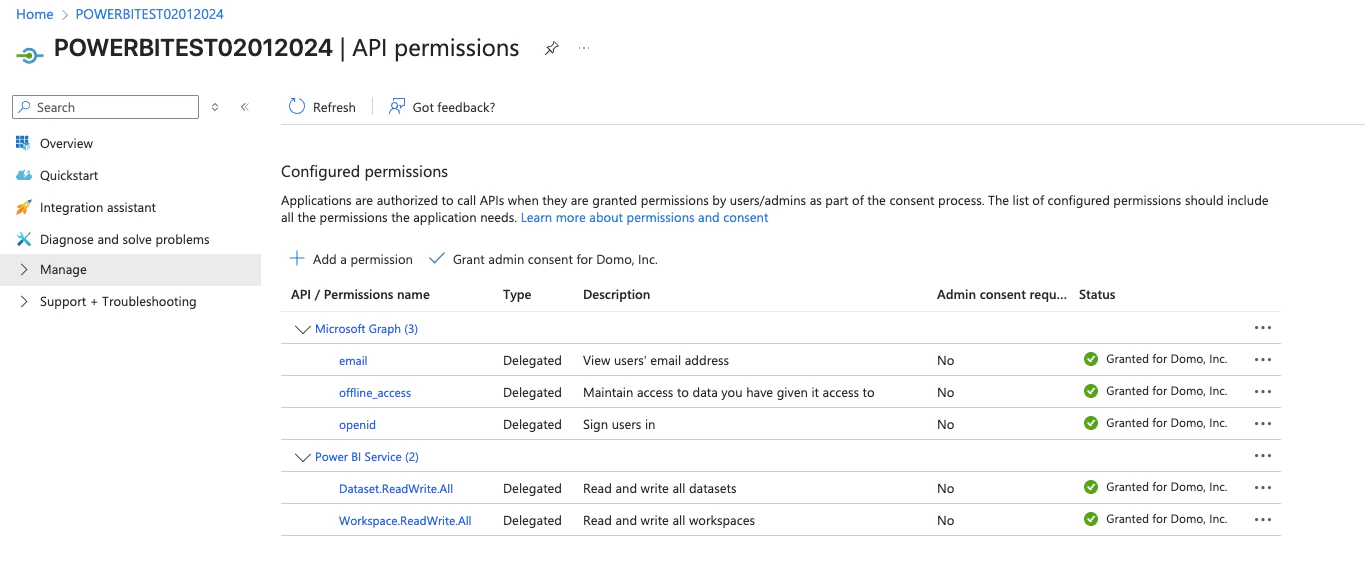
- Once the application is registered, assign the required API permissions for your application.
- Click API Permissions > +Add a permission.
- Request API Permissions page will appear displaying the commonly used APIs.
- Select the API, and add the Delegated and Application permissions.
- Click on Grant admin consent, then click Yes to allow the admin consent for your permissions.The added permissions will appear in the Configured permissions section with their details.
- Now, click on Certificates & Secrets. Certificates can be used as secrets to prove the application’s identity when requesting a token. Also, can be referred to as public keys.
- Click on + New Client Secret button.
- Specify the client secret description and the expiry period for your client secret, and click Add.
- Copy the value and paste it into the Client Secret field in the Connector credentials section in Domo.
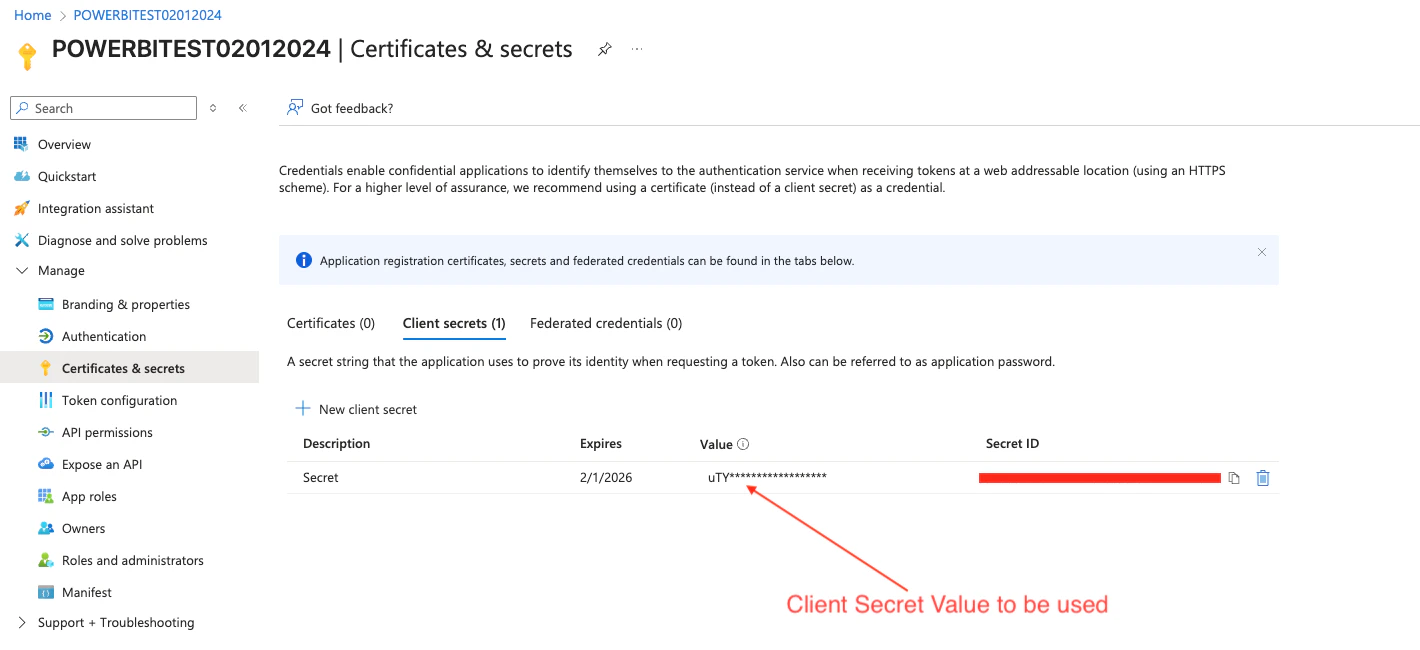
Note: Ensure to copy the Value and not the Secret ID.
Enabling the ‘Allow public client flows’
- Go to https://portal.azure.com.
- Select Microsoft Entra ID > Under Manage > Select App registrations.
- Find and click on your web app.
- Click on Authentication.
- Enable the following mobile and desktop flows by selecting YES.
Granting Admin consent in App registration
- Go to https://portal.azure.com.
- Select Microsoft Entra ID > Under Manage > Select App registrations.
- Find and click on your web app that you want to enable the admin consent for.
- Select API permissions.
- Review the permissions that the application requires. If you agree, select Grant admin consent.
Configuring the Connection
This section enumerates the options in the Credentials and Details panes in the Power BI AAD Writeback Connector page. The components of the other panes in this page, Scheduling and Name & Describe Your DataSet, are universal across most Connector types and are discussed in great detail in Adding a DataSet Using a Connector.Credentials Pane
This pane contains fields for entering credentials to connect to your Power BI account. The following table describes what is needed for each field:Field | Description |
|---|---|
Azure App Client ID | Enter the client ID of the client web app obtained from Azure Active Directory configuration. For more information, see “Obtaining the Azure App Client ID”. |
Azure App Client Secret | Enter the secret key of the client web app. For more information, see “Obtaining the Azure App Client Secret”. |
Azure Tenant ID | Enter your Tenant ID. For more information, see “Obtaining the Tenant ID”. |
Details Pane
This pane contains a number of fields for specifying your data and indicating where it’s going.| Menu | Description |
|---|---|
| Domo Input DataSet Id | Enter your Domo dataset ID(GUID) located in the dataset URL. For example: https://customer.domo.com/datasources/aaaaaaaa-bbbb-cccc-dddd-eeeeeeeeeeee/details/settings |
| Select Group | Select the group (The workspace ID). |
| Enter Dataset Name | Enter the dataset name in the specified group (workspace). |
| Enter Table Name | Enter the table name to update the metadata and schema for the specified table in the dataset from My workspace. |
| Cast Decimal to Double (checkbox) | Select this checkbox to convert the Decimal column from the input dataset to Double in Power BI. |
| Batch Size | Set a batch size for your dataset. Enter a batch size between 1 and 10,000. The default is 300 records per API call. You can adjust this setting to improve performance: - To reduce dataset execution time, increase the batch size. - If you get an Out of Memory error, try decreasing the batch size. |